15. Administration
This is where your ICAS Administrator will create new Domains, Infrastructures & ICAS Users. They can also subscribe users to receive Notifications for Alerts generated within ICAS. Additionally this is where you can create a new Discipline together with a set of Activities and Controls.
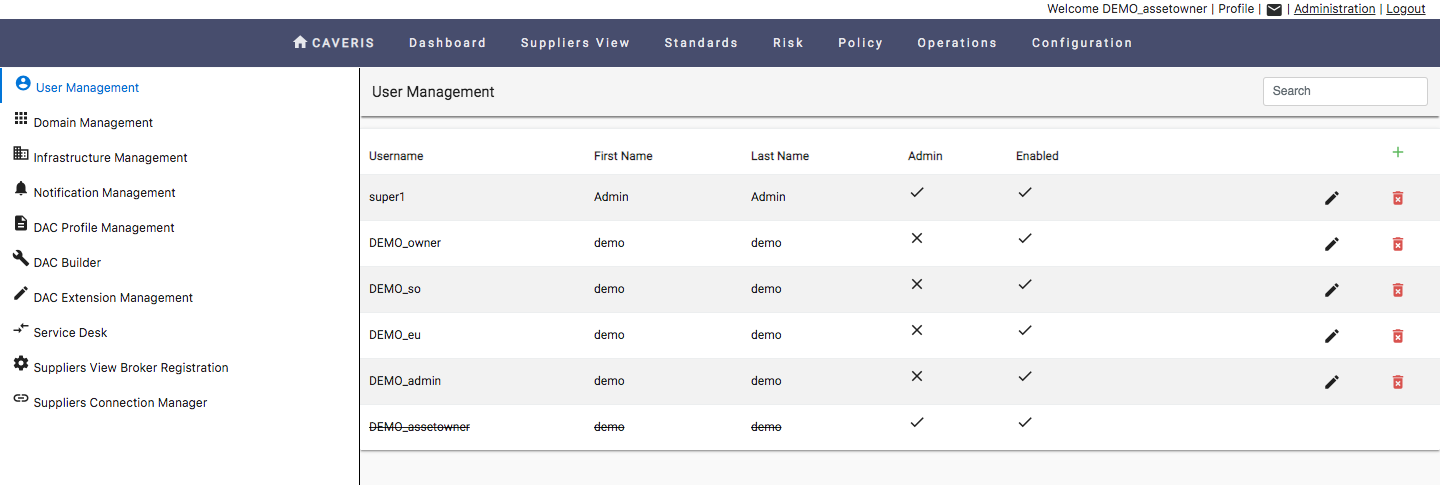
15.1. User Management
The User Management page can be used for User configuration. The following options are available:
- To create a new User, click on the green add symbol
- To remove an existing User, click on the red bin symbol
- To edit an existing User, click on the black pen symbol
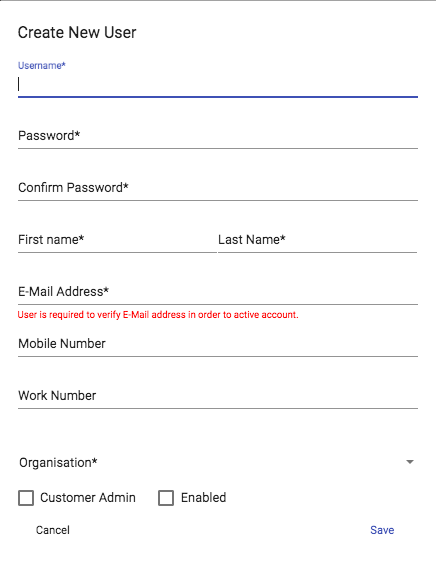
When creating a User, the information below will need to be filled out.
15.2. Organisation Management
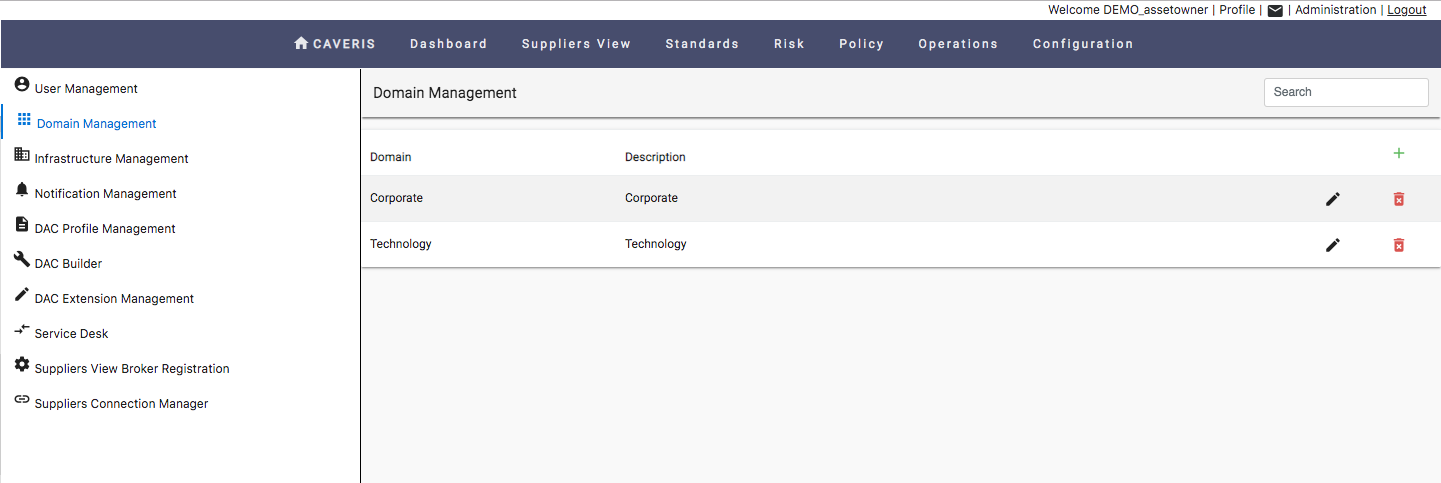
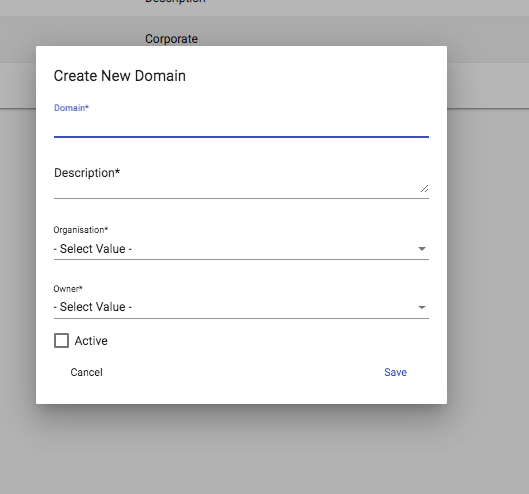
15.3. Domain Management
The Domain Management page can be used for Domain configuration. The following options are available:
To create a new Domain, click on the green add symbol
To remove an existing Domain, click on the red bin symbol
To edit an existing Domain, click on the black pen symbol
When creating a Domain, the information below will need to be filled out.
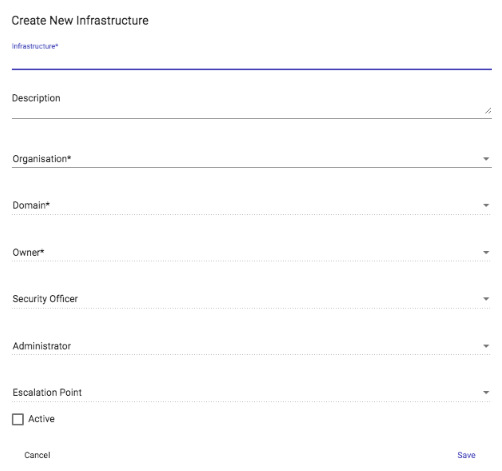
15.4. Infrastructure Management
The Infrastructure Management page can be used for Infrastructure configuration. The following options are available:
- To create a new Infrastructure, click on the green add symbol
- To remove an existing Infrastructure, click on the red bin symbol
- To edit an existing Infrastructure, click on the black pen symbol
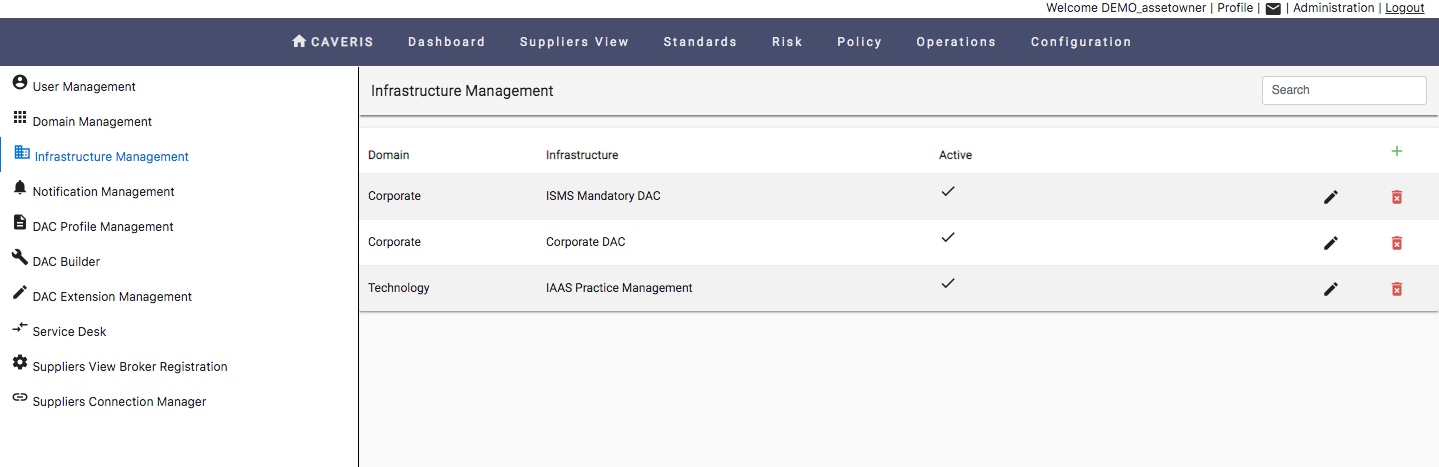
When creating an Infrastructure, the information below will need to be filled out.
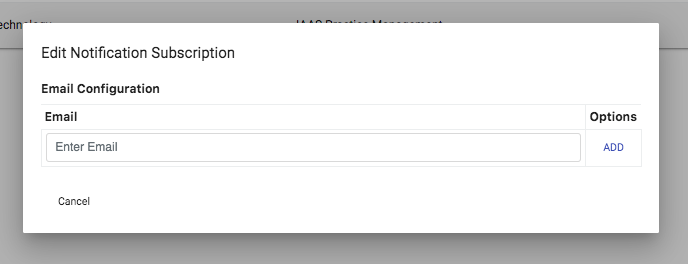
15.5. Notification Management
The Notification Management page can be used for Notification configuration. ICAS Notifications are configured at the Infrastructure level and can be sent to Users via email. The following options are available:
- To edit an existing Infrastructure for Notification Management, click on the black pen symbol
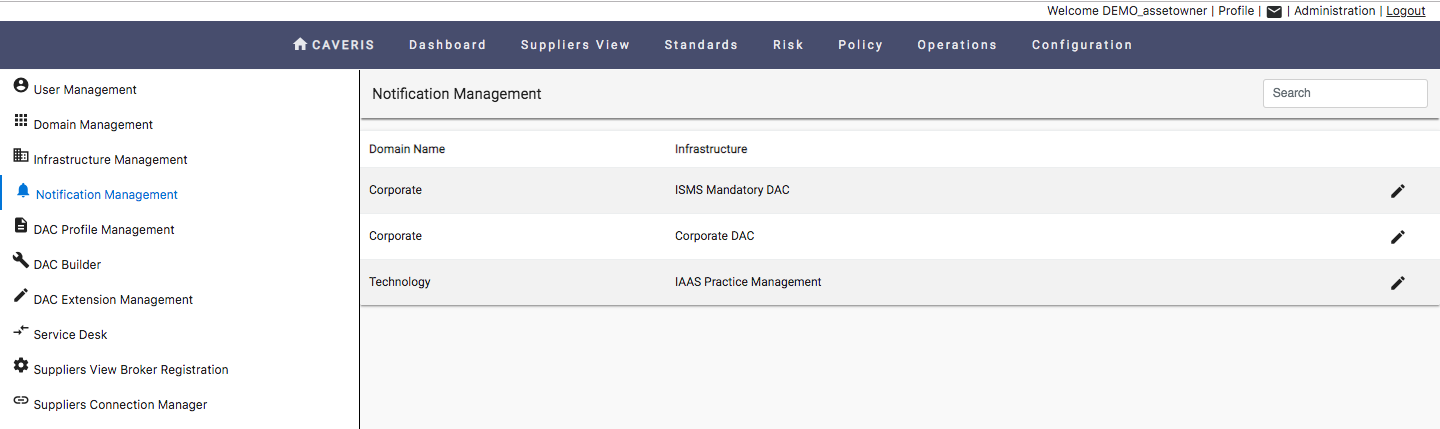
When adding a Notification Subscription, the information below will need to be filled out.
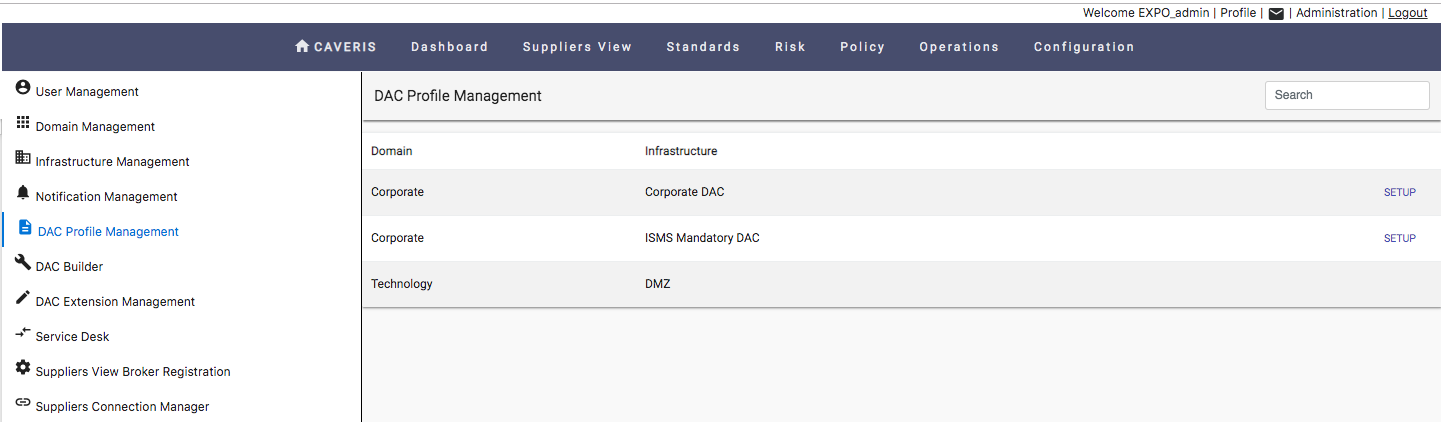
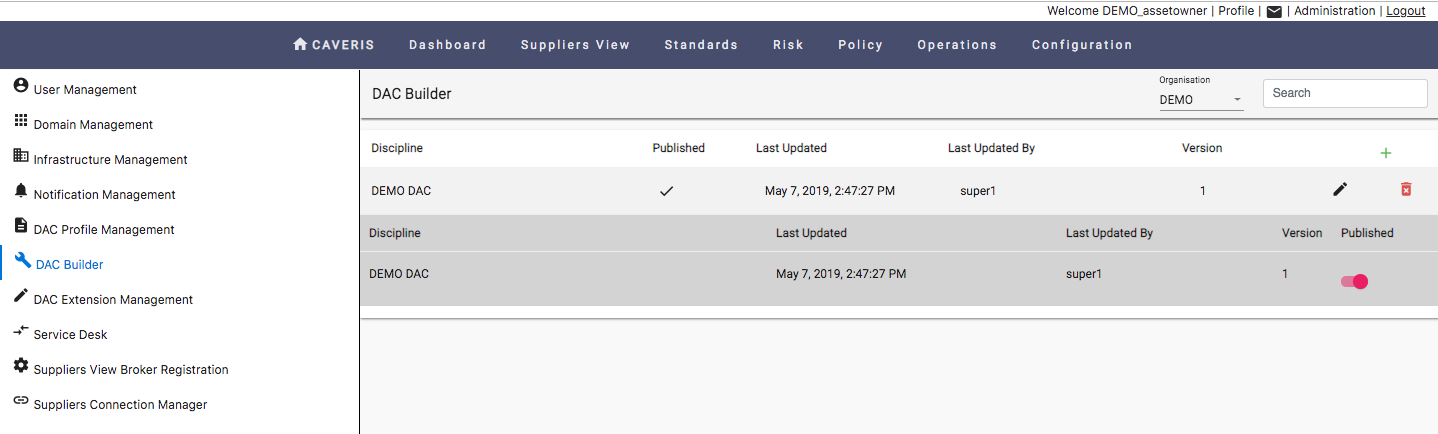
15.6. DAC Profile Management
The DAC Profile Management page can be used for DAC configuration. The following options are available:
- To setup a new DAC Profile click the blue SETUP button
Once a DAC profile is setup it will instantiate all Disciplines, Activities and Controls below the specified Infrastructure.
By Default, DACs that are applied to an Infrastructure will be disabled. To enable a DAC, the User must do so via the DAC page under Configuration. @11.2.1. Enabling a DAC
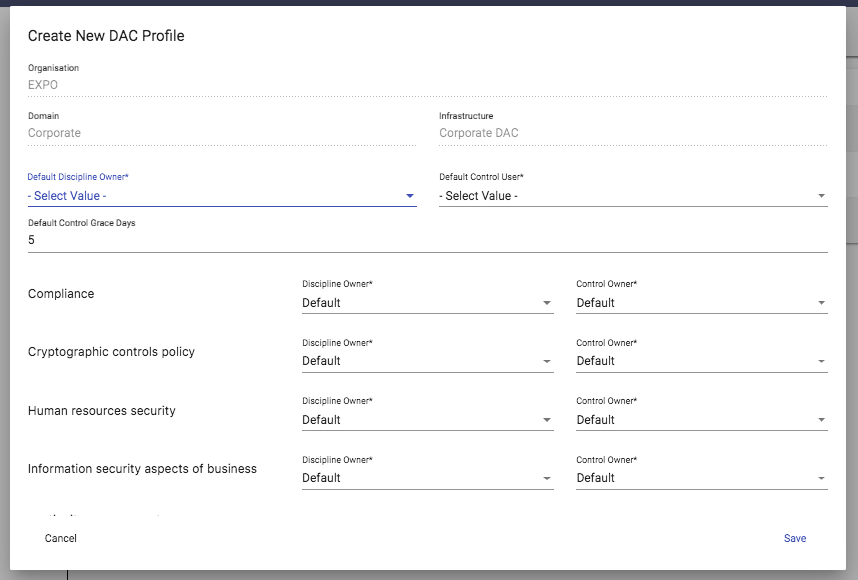
To setup a new DAC Profile the information below will need to be filled out.
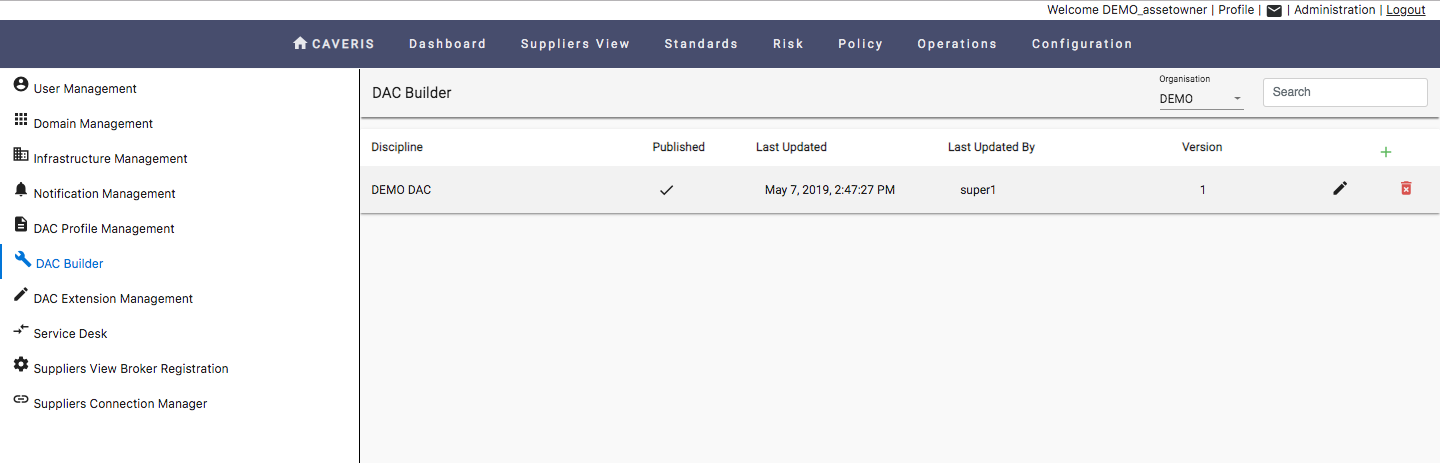
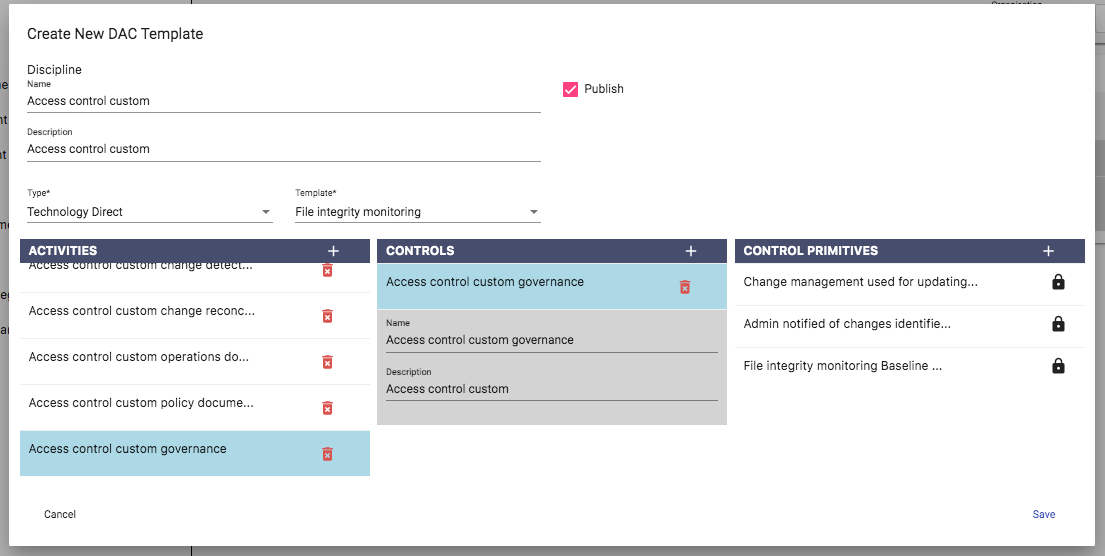
15.7. DAC Builder
As well as the pre defined set of DAC templates, Custom DAC templates can also be created using the DAC Builder page and then applied to an Infrastructure using the DAC Extension Management page.
The DAC Builder page can be used to create Custom DAC templates. The following options are available:
- To create a new Custom DAC template, click on the green add symbol
- To remove a Custom DAC template, click on the red bin symbol
- To edit an existing Custom DAC template, click on the black pen symbol
To begin creating a template, the User must choose a Type of template and then a Template associated to that type. The list of types of template the user can choose from are as follows:
- Custom
- Technology Direct
- Technology Indirect
- Corporate DAC
The Templates are based upon Disciplines related to the chosen type. Once a template has been chosen, the User will be presented with any Activities, Controls, and Control Statements associated with that template.
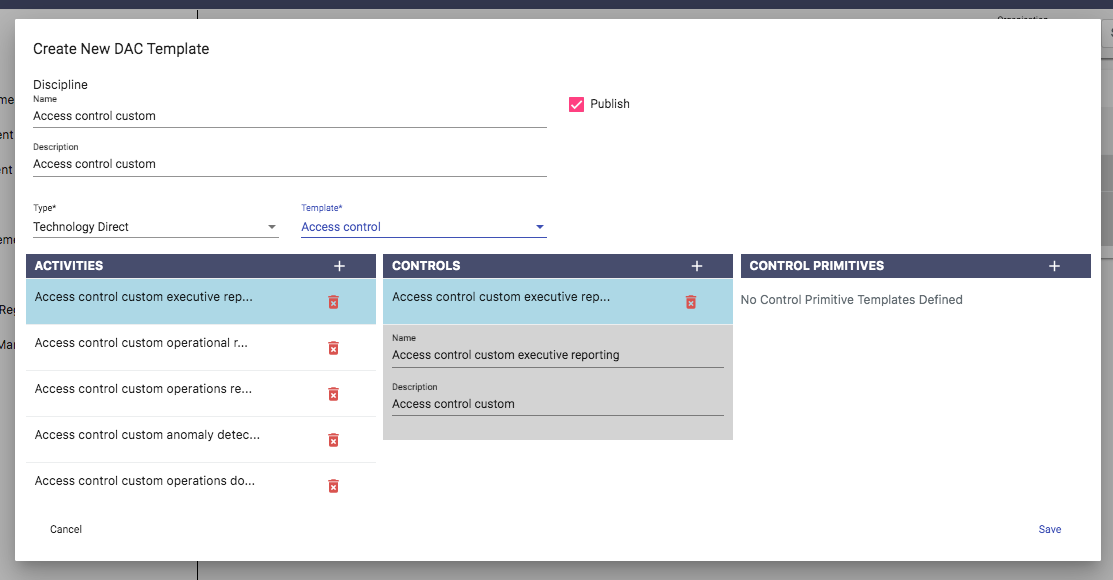
Activities, Controls, and Control Statements can then be added, deleted or edited as per the Users requirements.
For a Custom DAC to be applied to an Infrastructure via the DAC Extension Management page, the Publish option must first be chosen.
Some Control Primitives are required for a given Control and thus cannot be altered. Such Control Primitives are indicated by having the lock symbol in place of the red bin symbol.
Existing Custom DACs can be Published or Unpublished by clicking on the DAC template within the DAC Builder page. The User will be presented with a drop down which includes the ability to Publish or Unpublish a template.
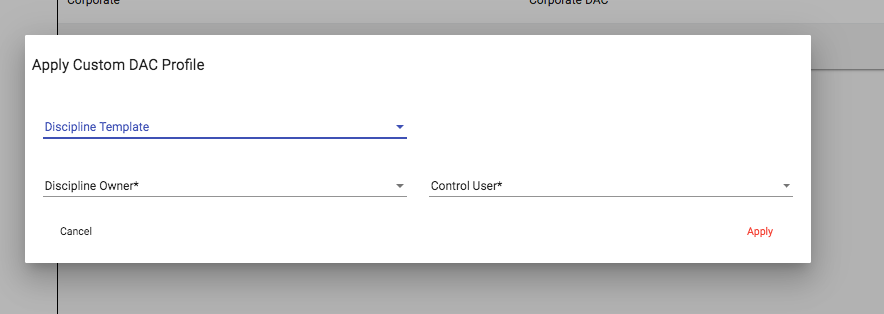
15.8. DAC Extension Management
To Apply a Custom DAC that has been created and Published within the DAC Builder page, the User can click the black pen symbol in DAC Extension Management page.
By Default, Custom DACs that are applied to an Infrastructure will be disabled. To enable a DAC, the User must do so via the DAC page under Configuration. @11.2.1. Enabling a DAC
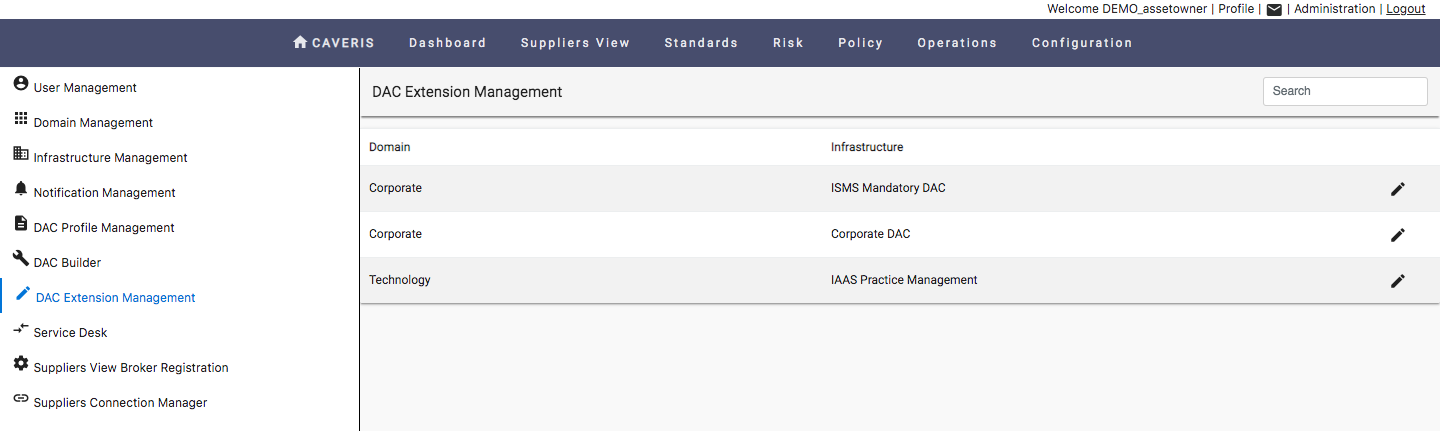
To Apply a new Custom DAC Profile, the information below will need to be filled out.
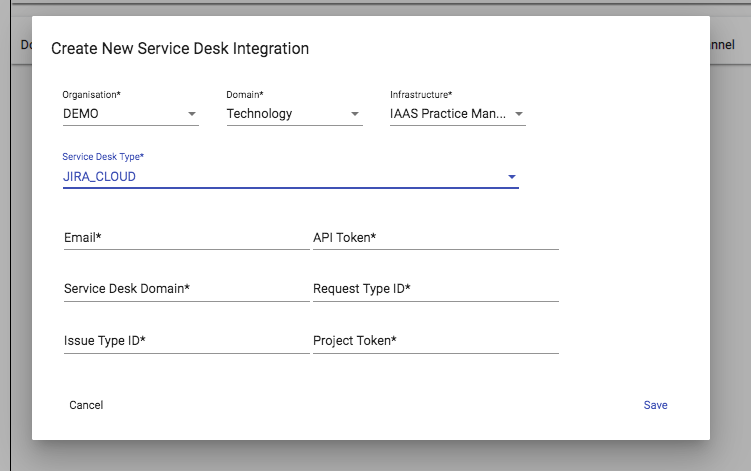
15.9. Service Desk
The Service Desk Management page can be used for Service Desk Integration. The following options are available:
To create a new Service Desk Integration click on the green add symbol
To remove an existing Service Desk Integration click on the red bin symbol
To edit an existing Service Desk Integration click on the black pen symbol
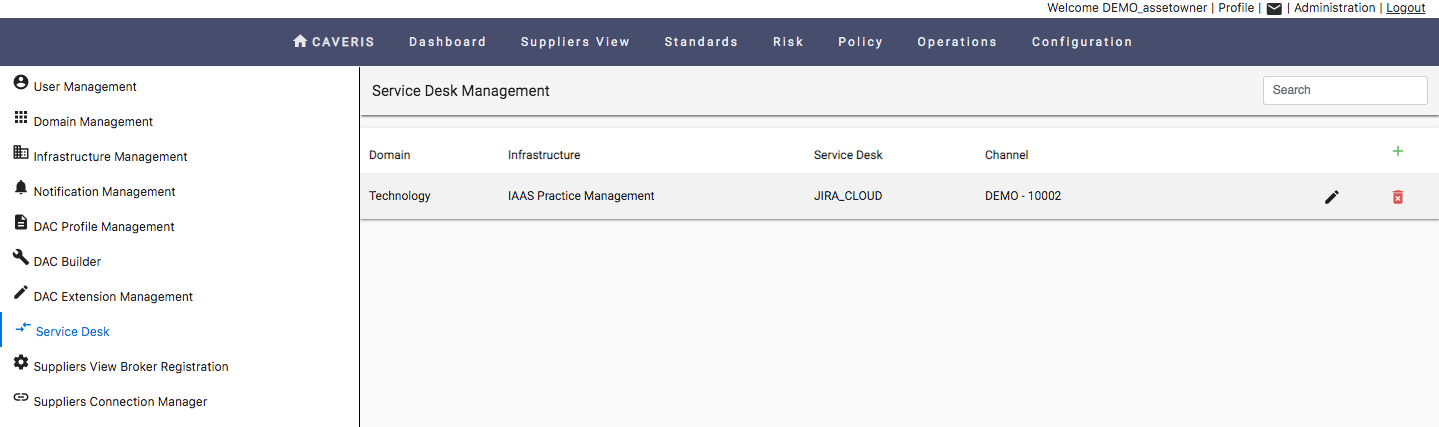
To Create a new Service Desk Integration, the following parameters will need to be filled out:
- Organisation
- Domain
- Infrastructure
- Service Desk Type
- API Token
- Service Desk Domain
- Request Type ID
- Issue Type ID
- Project Token