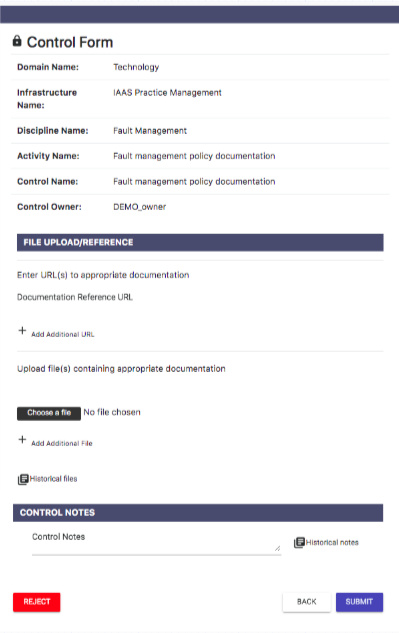
13. Control Forms
Once a Control has been run, in turn kicking off the workflow, the User may be required to fill out Control Form(s) as part of the workflow. Once the User has navigated to the appropriate Message and chosen the Go To Task option they will be presented with a Control Form.
Control Forms come in various formats dependent on which workflow they are part of and which step of the workflow they are situated at.
But in general Control Forms are made up of any of the following sections:
- Control Statements
- File/ URL Upload
- Control Notes
- Regulatory Status
Requisite Information will need to be filled out before the Control Form can successfully be submitted by clicking the SUMBIT button, and therefore move the Control forward within the workflow. A User can also navigate back to Messages by clicking the BACK button. Alternatively, the User can terminate the Control by clicking the REJECT button.
Rejecting a Control will terminate that Control with a zero score which will affect the overall Security Posture SAI rating of the Organisation.
By trying to SUBMIT a Control Form without inputting the requisite information the User will be presented with the following pop-up error message.

To navigate back to the Control Form and input the requisite information the User can click the Cancel button. Alternatively, the User has 2 other options:
- Send the form to the Security Officer
- Confirm non-compliance
Choosing one of these options will present the User with a drop down text box to input a reason for their choice.
Choosing to send the Control Form to the Security Officer will put the Control into Escalation.
Confirming non-compliance will terminate the Control with a zero score which will affect the overall Security Posture SAI rating of the Organisation.
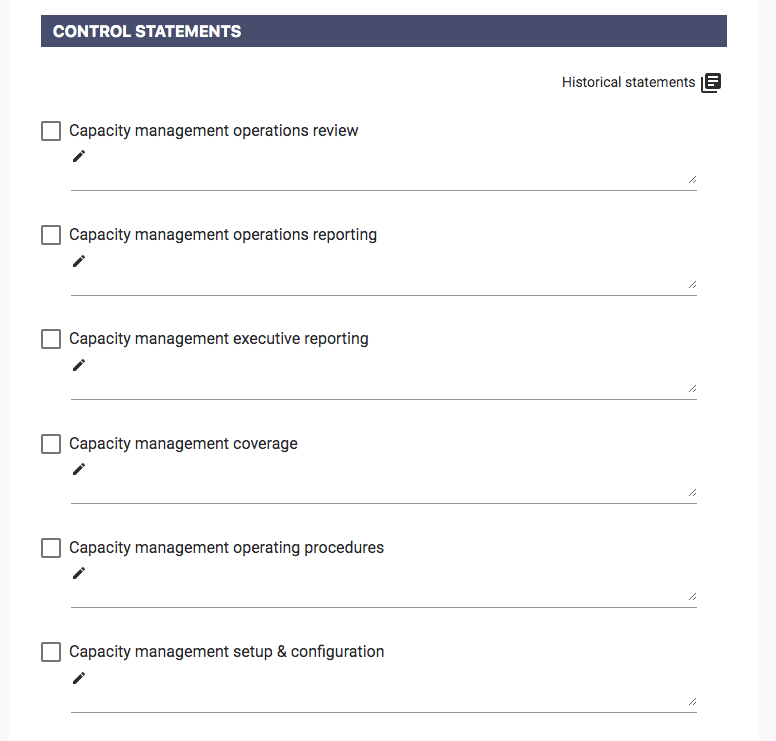
13.1. Control Statements
The Control Statements section of a Control Form is comprised of various parameters related to the Control that require User input. The User is required to check a tick box and input text relevant for each statement prior to submitting the Control Form.
By hovering over a statement the User will be presented with additional information.
By clicking Historical Statements, the User will be presented with a pop-up displaying previously submitted Control Statement sections and the input associated with them.
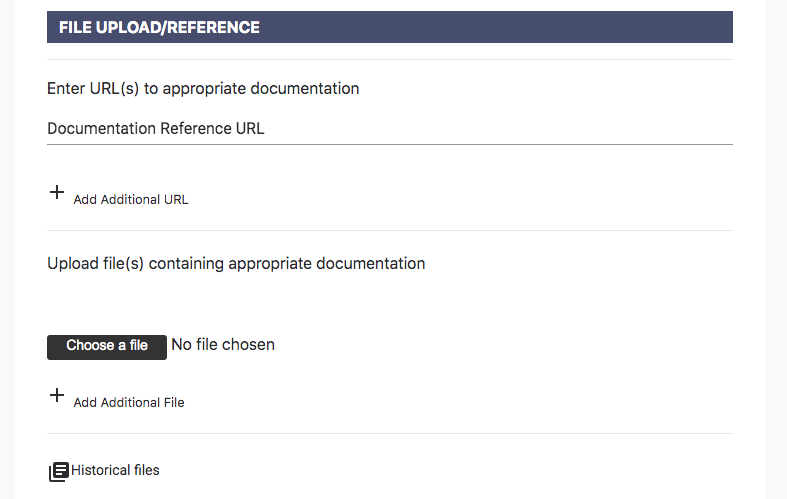
13.2. File Upload/ Reference
The User is required to attach documentation to the Control Form prior to submission. Documentation can be attached in either the form of a file attachment or a URL link. Multiple documents can be attached to any Control.
By clicking Historical files, the User will be presented with a pop-up displaying previously submitted documentation for that Control.
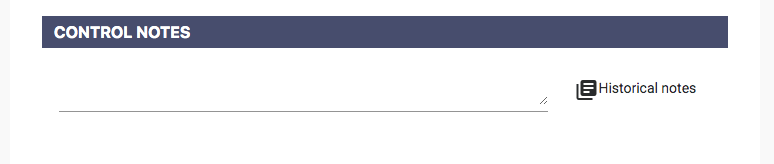
13.3. Control Notes
The User is required to input text relevant to the Control in the Control Notes section prior to submission of the Control Form.
By clicking Historical notes the User will be presented with a pop-up displaying previously submitted Control Notes for that Control.
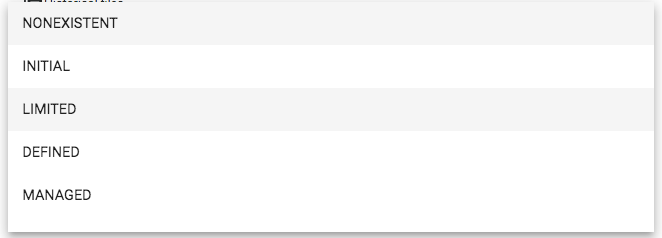
13.4. Regulatory Status
For ISMS specific Controls the User will be required to choose a Regulatory Status prior to submission. By clicking on the Regulatory Status drop down the User will be presented with the following options:
- NONEXISTENT
- INITIAL
- LIMITED
- DEFINED
- MANAGED
The Regulatory Status choice will be reflected in the ISO27001: ISMS Compliance page. @7.1. ISO 27001: ISMS Compliance